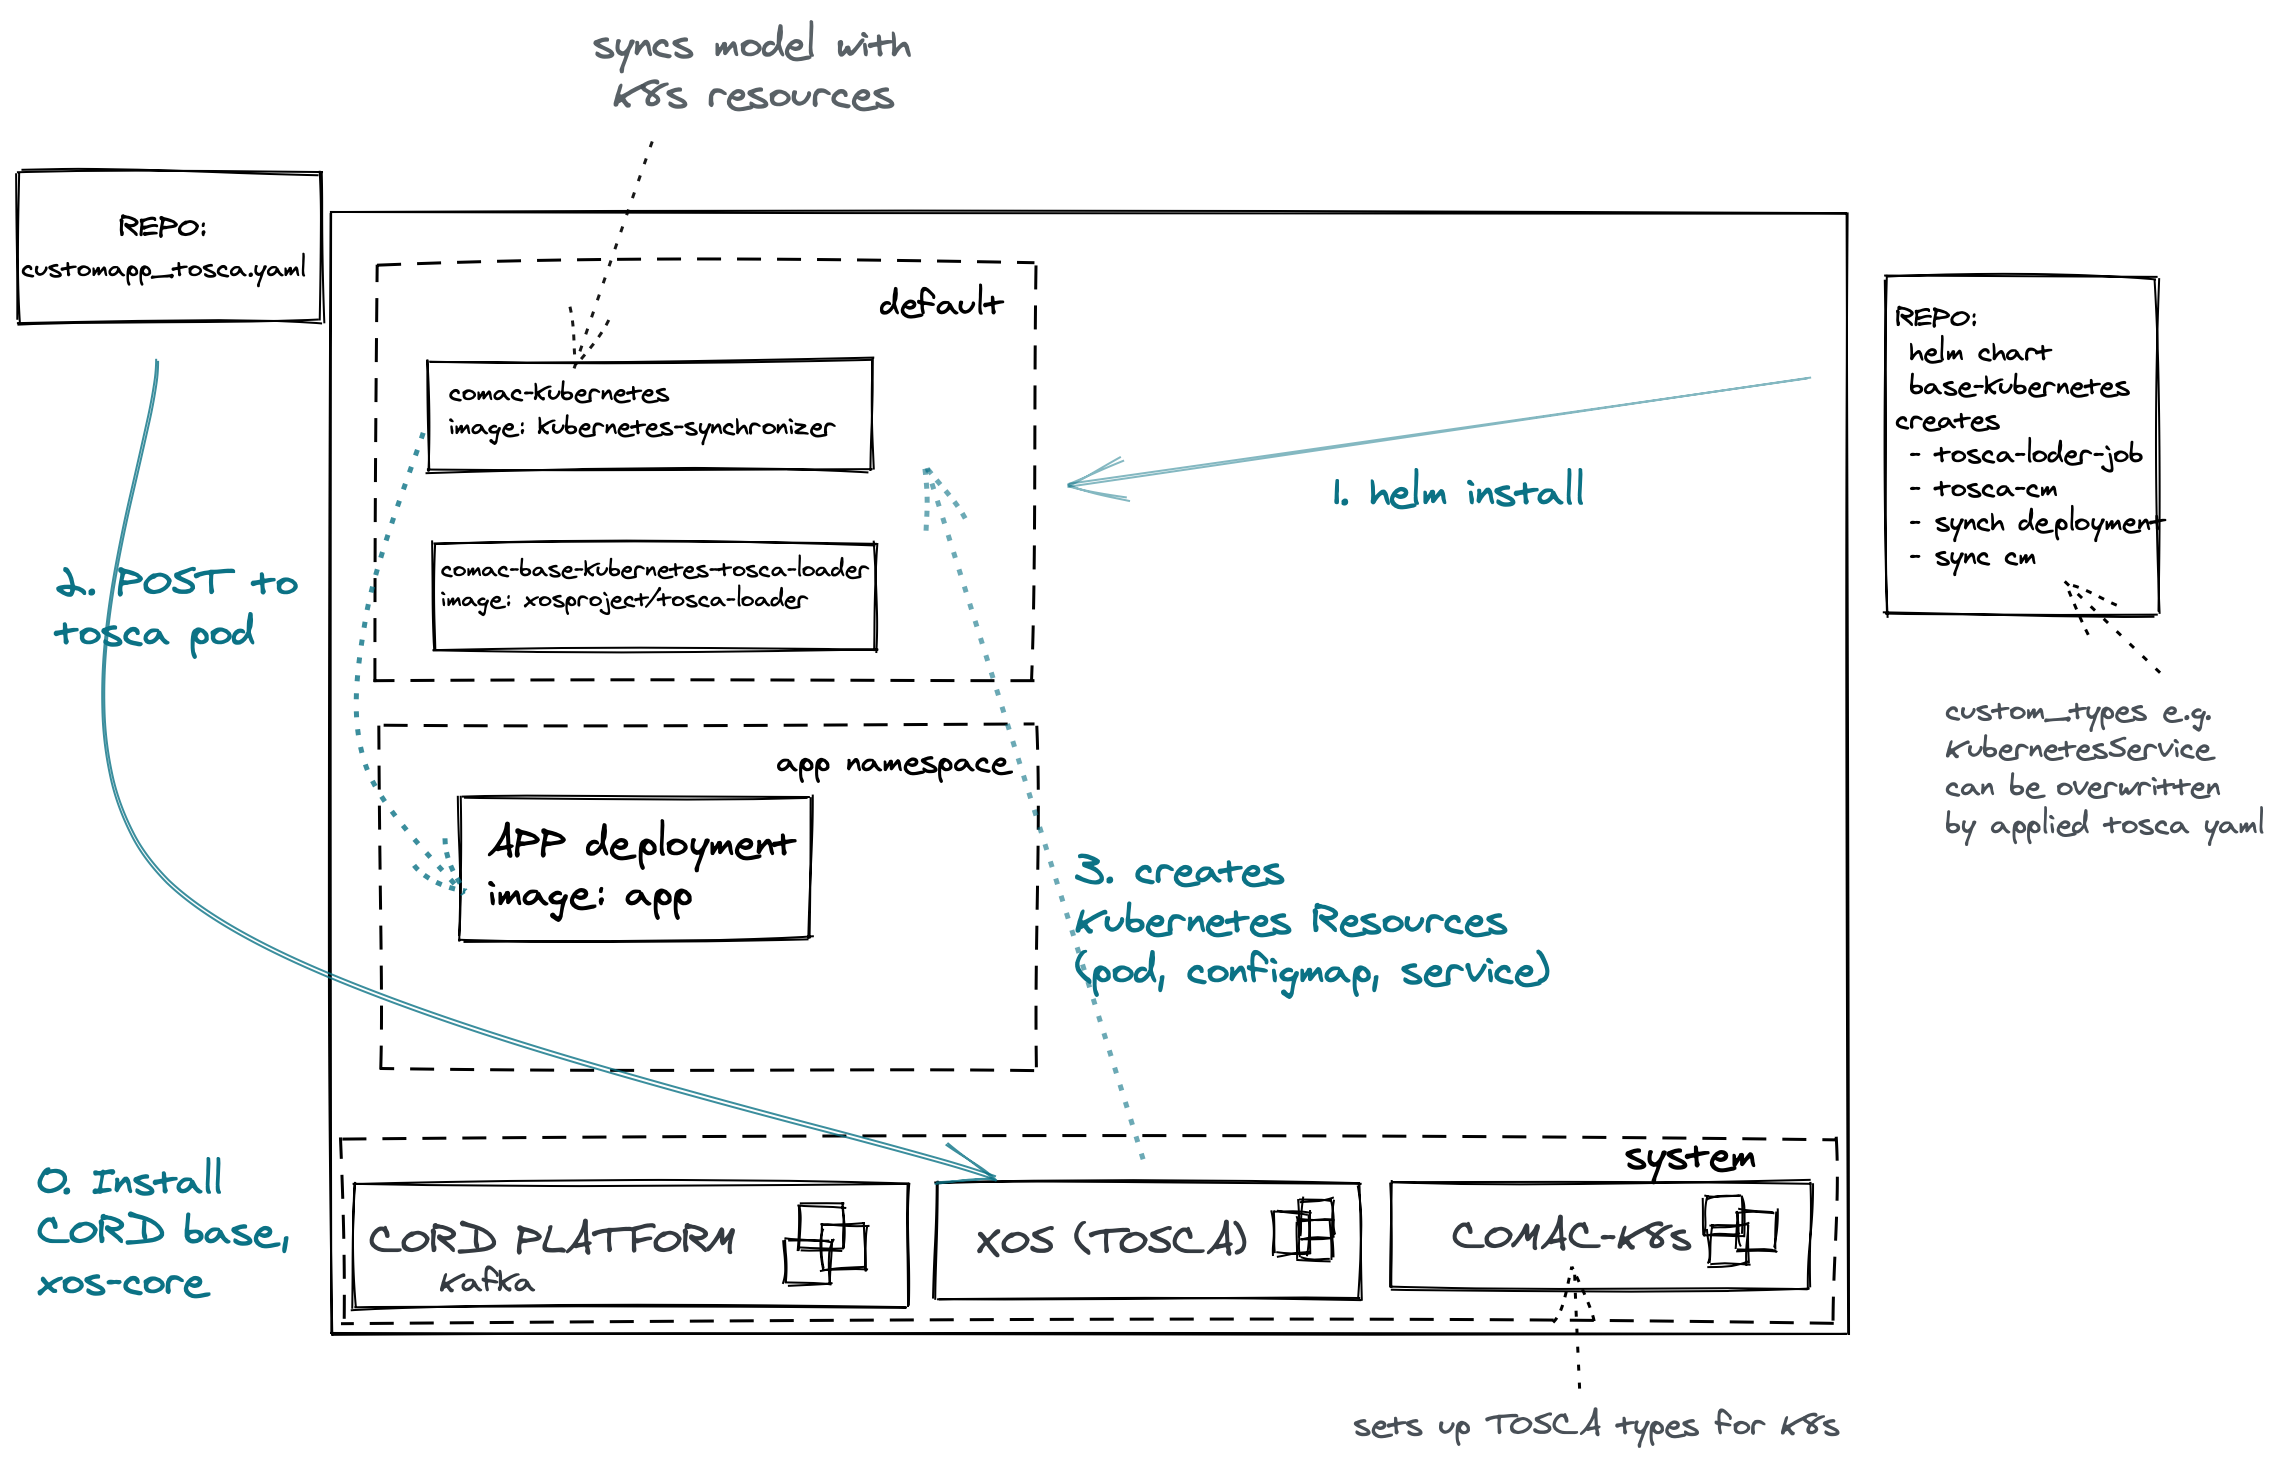
This blog post describes how you can deploy a few Kubernetes resources onto an edge computing platform, so that those resources can be managed via XOS.
What is XOS?
The CORD platform gives network operators a cloud-native and open-source reference implementation of a Mobile Edge Computing stack.</br>
It mostly consists of
- XOS, the extensible service control plane responsible for service management
- ONOS the SDN controller, taking care of the infrastructure devices and links, while managing the network (from paths to flow rules)
- VOLTHA (optional), virtual OLT hardware abstraction, broadband as a service, PON network management
- Kafka, for event processing between the different components
- Logging and monitoring tools all of which are containerized and running on Kubernetes.
XOS is helping you generate the control plane by allowing you to define your own service models that are then synchronized to either Kubernetes, OpenStack or other environments.
Usually you’d have to write a model (detailing attributes and components of future resources) as well as a synchronizer (detailing what steps to take for which model), for example for custom services.
Luckily there is already a base-kubernetes service, that allows you to wrap your Kubernetes resources.
How to deploy CORD
 Starting with step 0 in the diagram above, we want a CORD installation that includes XOS. The simplest and fastest way of doing that is installing COMAC-in-a-box by running
git clone https://gerrit.opencord.org/automation-tools
cd automation-tools/comac-in-a-box
make
make test
That installs everything for you, including the Kubernetes cluster CORD is running on.
Step 1 is also covered as the script sets up a base-kubernetes, registering the Kubernetes service model with XOS and deploying the Kubernetes synchronizer (see default namespace).
How to talk to the synchronizer
Step 2 requires us to write a TOSCA YAML file to wrap the Kubernetes resources.
tosca_definitions_version: tosca_simple_yaml_1_0

description: Make a STK image via yaml

imports:
  - custom_types/kubernetesservice.yaml
  - custom_types/kubernetesresourceinstance.yaml

topology_template:
  node_templates:
    service#kubernetes:
      type: tosca.nodes.KubernetesService
      properties:
        name: kubernetes
        must-exist: true

    app_resource_one:
      type: tosca.nodes.KubernetesResourceInstance
      properties:
        name: "app-resource-one"
        resource_definition: |
        <insert Kubernetes YAML>
      requirements:
        - owner:
            node: service#kubernetes
            relationship: tosca.relationships.BelongsToOne

    ...
    app_resource_n:
      type: tosca.nodes.KubernetesResourceInstance
      properties:
        name: "app-resouce-n"
        resource_definition: |
        <insert Kubernetes YAML>
      requirements:
        - owner:
            node: service#kubernetes
            relationship: tosca.relationships.BelongsToOne
This YAML file can now be sent to the TOSCA pod (which is a part of the XOS service) via a POST request. The username and password are configured for CORD, defaults and how to configure them can be found here.
curl -H "xos-username: $USERNAME" -H "xos-password: $PASSWORD" -X POST --data-binary @tosca.yaml http://$( hostname ):30007/run
Step 3: That creates both instances in XOS (see in the XOS GUI at port 30001) and in Kubernetes (see kubectl get pods -A). For deleting those instances repeat the curl with a /delete instead of /run.
There are other options of creating a custom XOS service, or using the other options for creating Kubernetes resources e.g. using KubernetesSecret or KubernetesSecretVolumeMount to avoid using KubernetesResourceInstance for everything, but at the time of this post very few resources are covered by this (pods, secrets, configmaps, NodePort services).